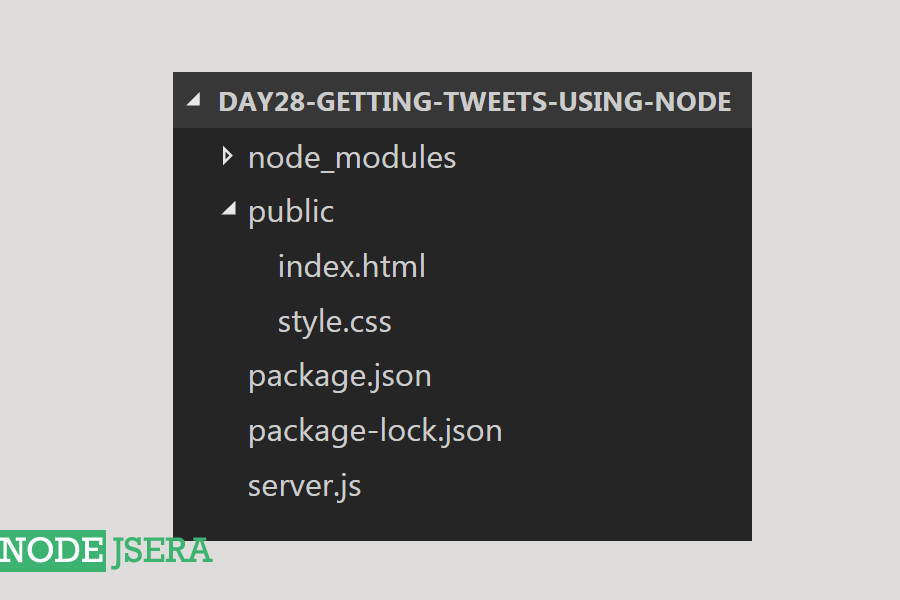
Day 28 : Getting tweets using node.js
How to get tweets from twitter Using twitter's streaming API , node.js and socket.io for
backend; HTML5 , CSS3 , jquery , socket.io and bootstrap for
frontend; And MySQL database for storage.
- Day 1 - The Beginning
- Day 2 - File System in node.js
- Day 3 - Regular expressions in node.js
- Day 4 - Console module in node.js
- Day 5 - All about errors
- Day 6 - Array methods
- Day 7 - All about NPM
- Day 8 - Publishing package on NPM
- Day 9 - Crypto Module ( Hashing and HMAC)
- Day 10 - Crypto Module ( Encryption and Decryption )
- Day 11 - Express Framework
- Day 12 - CRUD in MongoDB using node.js
- Day 13 - Sign Up form in node.js
- Day 14 - Introduction to socket.io
- Day 15 - All about streams
- Day 16 - Zlib Module
- Day 17 - CRUD in MySQL using node.js
- Day 18 - Concepts of callbacks in node.js
- Day 19 - Query String in node.js
- Day 20 - Timers in node.js
- Day 21 - Buffers in node.js
- Day 22 - String Decoder Module in node.js
- Day 23 - Debugger module in node.js
- Day 24 - Child Processes in node.js
- Day 25 - Clusters in node.js
- Day 26 - OS module in node.js
- Day 27 - Assert module in node.js
- Day 28 - Getting Tweets using node.js
- Day 29 - Uploading file to dropbox using node.js
- Day 30 - Github API with node.js
We've reached 28th day of our node.js tutorial series and here we are with our second project tutorial in which we create a system with the help of which we can get tweets from twitter corresponding to a certain keyword. All this is achieved with the help of node.js and twitter's streaming API. We'll also use MySQL to store all the tweets in a database for further evaluation.
Contents:
- Simple form using HTML5 to get the
keywordto be searched. - Creating the backend using node.js , MySQL and sockets.
- Adding socket to the frontend to print live tweets.
- Styling the html with CSS3 and bootstrap.
- Celebrating the success with screenshots from working app.
- Node.js installed
- MySQL db installed
- An account on Twitter
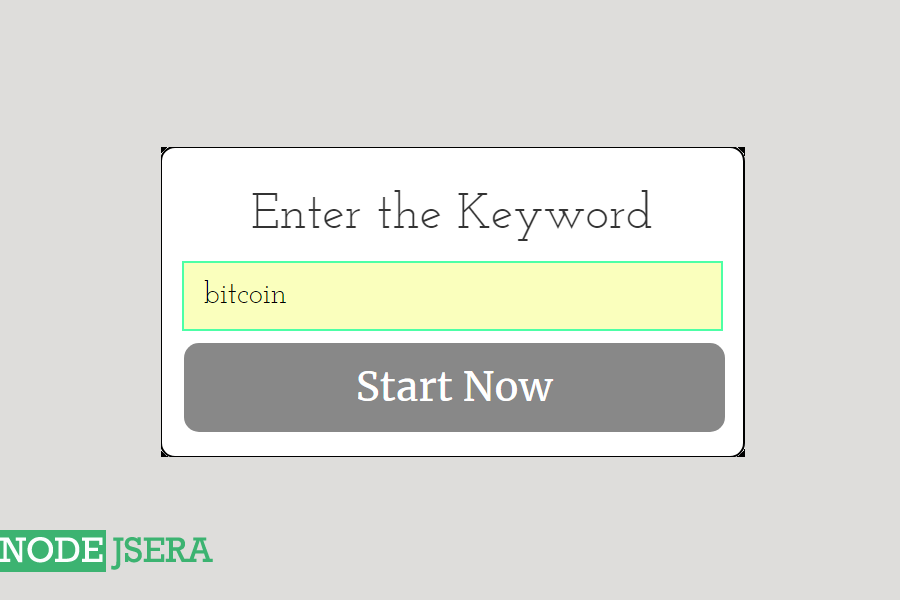
Let's start by creating a simple static form in HTML5 which accepts the keyword whose tweets is to be searched.
This form is having only 1 field :
-
Keyword :It takes keyword as input and search tweets on this keyword's basis.
We are starting with the coding part now, Although the code is self explanatory but informative comments are provided where ever needed.
-
index.html :
<html>
	<head>
		<title> Tweetoletics | nodejsera </title>
		<!-- Include Socket.io from CDN -->
			<script src="https://cdnjs.cloudflare.com/ajax/libs/socket.io/2.0.3/socket.io.js"></script>
		<!-- Include Jquery from CDN -->
			<script src="https://code.jquery.com/jquery-3.2.1.slim.min.js"
					integrity="sha256-k2WSCIexGzOj3Euiig+TlR8gA0EmPjuc79OEeY5L45g="
					crossorigin="anonymous">
			</script>
		<!-- Include Bootstrap from CDN -->
			<link rel="stylesheet" href="https://maxcdn.bootstrapcdn.com/bootstrap/3.3.7/css/bootstrap.min.css" integrity="sha384-BVYiiSIFeK1dGmJRAkycuHAHRg32OmUcww7on3RYdg4Va+PmSTsz/K68vbdEjh4u" crossorigin="anonymous">
		<!-- Include External CSS -->
			<link rel="stylesheet" type="text/css" href="style.css">


	</head>
	<body>
		<br>
		<br>
		<br>
		<div class="container" >
			<div class="row">

				<div class="col-md-3">
					<!-- Empty div -->
				</div>

				<div class="col-md-6 main">

						<h1> Enter the Keyword  </h1>

						<input class="box" type="text" name="keyword" id="keyword" placeholder="Enter the keyword"  required /> <br>

						<button  id="sub"  name="submitDetails" value="Start Processing" class=""> Start Now </button>

				</div>
				<div class="col-md-3">
					<!-- Empty div -->
				</div>

			</div>
		</div>
		<br>
		<br>
		<div class="container" >
			<div class="row">

				<div class="col-md-2">
					<!-- Empty div -->
				</div>

				<div class="col-md-8 main" id="tweets">
					<h1> Live Tweets </h1>
					<!-- Live tweets will be printed here -->
				</div>
				<br>
				<br>


				<div class="col-md-2">
					<!-- Empty div -->
				</div>

			</div>
		</div>
	</body>
	<!-- Sockets code comes here -->
</html>
In order to access twitter from your node.js application , you'll need to have your app credentials which include the following :
- Consumer Key
- Consumer Secret
- Access Token Key
- Access Token Secret
Now, let's move on to the crux of our application i.e. the backend. We are using node.js and sockets for data transfer between frontend and backend. MySQL is used for data storage. You can learn more about sockets and MySQL in the links provided below respectively :
Also we are using little bit of express for default path setup.You can learn more about express in the link provided below :Our backend is going to perform the following operations :
- Receiving the values from the frontend.
- Establishing a connection with
MySQL. - Storing the data received from Twitter's Streaming API in the MySQL database.
- Send the data received to the frontend using socket.io which will be displayed on
index.htmlpage.
Now let's move forword to the coding part of the backend :
-
Step 1 - Installation : Install the packages which we will be using in our application.
Some packages like
path,http, etc are inbuilt packages , so we needn't to install them. Let's install the rest of the packages :-
Installing
express
npm install express --save
-
Installing
socket.io
npm install socket.io --save
-
Installing
twitter
npm install twitter --save
-
Installing
MySQL
npm install mysql --save
-
Installing
body-parser
npm install body-parser --save
-
Installing
-
Step 2 - Code : Now we are ready to start with our
server.jsfile :-
Including the required packages :
express,mysql,path,body-parser,twitter,socket.io,request,http, etc.
var express = require('express');
//Initialize the express App
var app = express();
var server = require('http').Server(app);
var path = require('path');
var bodyParser = require('body-parser');
var io = require('socket.io')(server);;
//Twitter
var Twitter = require('twitter');
var request = require("request");
//MySQL
var mysql = require('mysql');
-
Initializing credentials for
MySQLandTwitter:
//Establishing a connection with mysql database
var connect =  mysql.createPool({
	host : 'localhost',
	user : 'root',
	password: '',
	database: 'my_db'
});

//Twitter Credentials
var client = new Twitter({
  consumer_key: 'YOUR_CONSUMER_KEY',
  consumer_secret: 'YOUR_CONSUMER_SECRET',
  access_token_key: 'YOUR_ACCESS_TOKEN_KEY',
  access_token_secret: 'YOUR_ACCESS_TOKEN_SECRET'
});
-
Create the server and set the default routes as shown below :
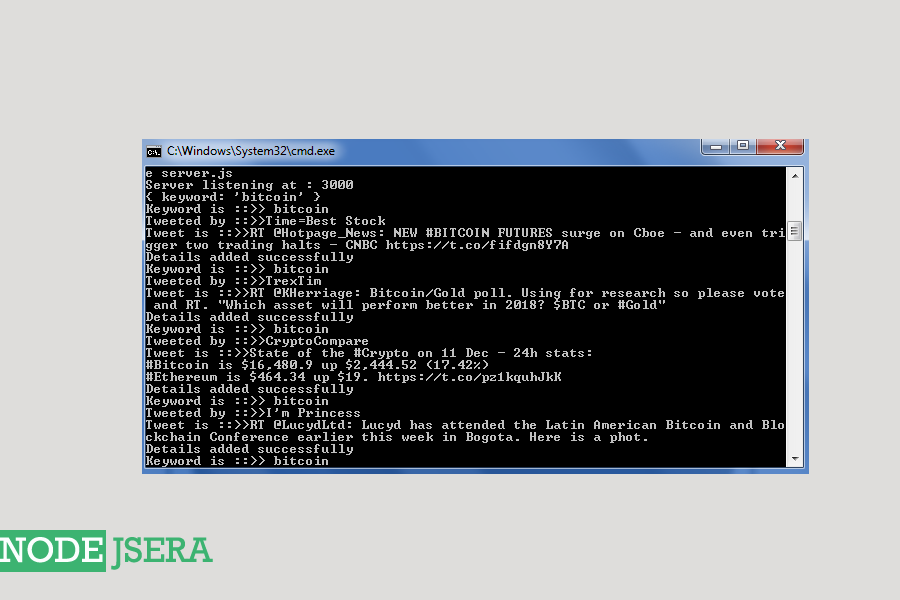
//starting server at 3000 port
server.listen(3000);
console.log("Server listening at : 3000");
//Default Route
app.get('/',function(req,res){
	res.set({
		'Access-Control-Allow-Origin' : '*'
	});
	return res.redirect('/public/index.html');
});

app.use('/public', express.static(__dirname + '/public'));
app.use( bodyParser.json() );
app.use(bodyParser.urlencoded({ // to support URL-encoded bodies
	extended: true
}));
-
Receive event emitted from the front with keyword. Start searching for tweets matching the keyword
and store it in the database. After that emit an event
livetweetswhich will be handled at front and helps in transferring live tweets from back to front.
io.on('connection', function (socket) {
	//Default event just for testing
	socket.emit('welcome', { data: 'welcome' });
	//Keyword event is handled here
	socket.on('keyword' , function(data){
		console.log(data);
		var keyword = data.keyword;
		var stream = client.stream('statuses/filter', {track: keyword});

		stream.on('data', function(event) {
			var tweet = event.text;
			var user = event.user.name;

			var insert_R = 'INSERT INTO tweet_repo(keyword,user,tweet) VALUE(?,?,?)';
			//establishing connection
			connect.getConnection(function(err, connection){
			  //Inserting a record into details
				connection.query(insert_R,[keyword,user,tweet], function(err,res){
					if(err) throw err;
					else {
							var content = {
								keyword : keyword,
								user : user,
								tweet : tweet
							}
							console.log("Keyword is ::>> " + keyword);
							console.log("Tweeted by ::>>" + event.user.name);
							console.log("Tweet is ::>>" + event.text );
							console.log('Details added successfully');
							//Emitting the data using sockets
							socket.emit('livetweets' , { data : content })

					}
				});
				//releasing connection
				socket.on('stop' , function(data){
					connection.release();
				});

			});

		});

		stream.on('error', function(error) {
			throw error;
		});
	});
});
-
Including the required packages :
Add this code in your index.html after closing the body tag.
<script>
	console.log('loading');
		//Jquery code starts here
		$('document').ready(function(){
			console.log('loaded');
			//Connecting the socket to host and port
			var socket = io.connect('http://localhost:3000');
			$("#sub").click(function() {
				//keyword event handled at backend is raised here
				socket.emit('keyword', { keyword : $("#keyword").val() });
			});
			//livetweets event raised at backend is handled here
			socket.on('livetweets' , function(data) {
				  console.log(data);
				  var t = data.data;
				  $('#tweets').append("<b> Keyword : " + t.keyword  + " </b> </div> <div class='content'> "
				  + t.user +  "</div><div class='content'>" +  t.tweet + "</div> <br> <hr>" );
			})
			//Event ends

		});
		//jquery code ends here
	</script>
We are using simple CSS for styling our Signup form. All the code here is self explanatory. Copy all this
in a file named style.css .
@import url('https://fonts.googleapis.com/css?family=Josefin+Slab');
@import url('https://fonts.googleapis.com/css?family=Inconsolata|Lato|Merriweather');
/**
	font-family: 'Inconsolata', monospace;
	font-family: 'Lato', sans-serif;
	font-family: 'Merriweather', serif;
**/

.main{
	padding:20px;
	font-family: 'Josefin Slab', serif;
	border : 2px solid #000000;
	border-radius: 15px;

}


.content{
	font-family: 'Inconsolata', monospace;
	font-size: 20px;
	color : #000000;
}
b{
	font-family: 'Inconsolata', monospace;
	font-size: 20px;
	color: black;
}


.main h1{
	font-size: 50px;
	text-align:center;
	font-family: 'Josefin Slab', serif;
	color: #33333;
}
input{
	font-family: 'Josefin Slab', serif;
    width: 100%;
	font-size: 30px;
    padding: 12px 20px;
    margin: 8px 0;
    border: 2px solid #222222;
}
button {
	font-family: 'Merriweather', serif;
	font-size: 40px;
	width: 100%;
    background-color: #888;
    border: none;
    color: white;
    padding: 16px 32px;
    text-decoration: none;
    margin: 4px 2px;
    cursor: pointer;
	border-radius: 15px;
}
input:focus,
select:focus,
button:focus {
    outline: none;
}

input:hover {
	font-family: 'Josefin Slab', serif;
    width: 100%;
    padding: 12px 20px;
    margin: 8px 0;
    box-sizing: border-box;
	border: 2px solid #4dffa6;
}

button:hover {
	font-family: 'Merriweather', serif;
	font-size: 40px;
	width: 100%;
    background-color: #1aff8c;
    border: none;
    color: white;
    padding: 16px 32px;
    text-decoration: none;
    margin: 4px 2px;
    cursor: pointer;
	border-radius: 15px;
}
We can run the server.js using the following command :
>node server.js
and open 127.0.0.1:3000 . Before starting the server make sure that MySQL in working.
-
index.html
URL is : http://127.0.0.1:3000/public/index.html
-
SnapShot of the backend up and running :
-
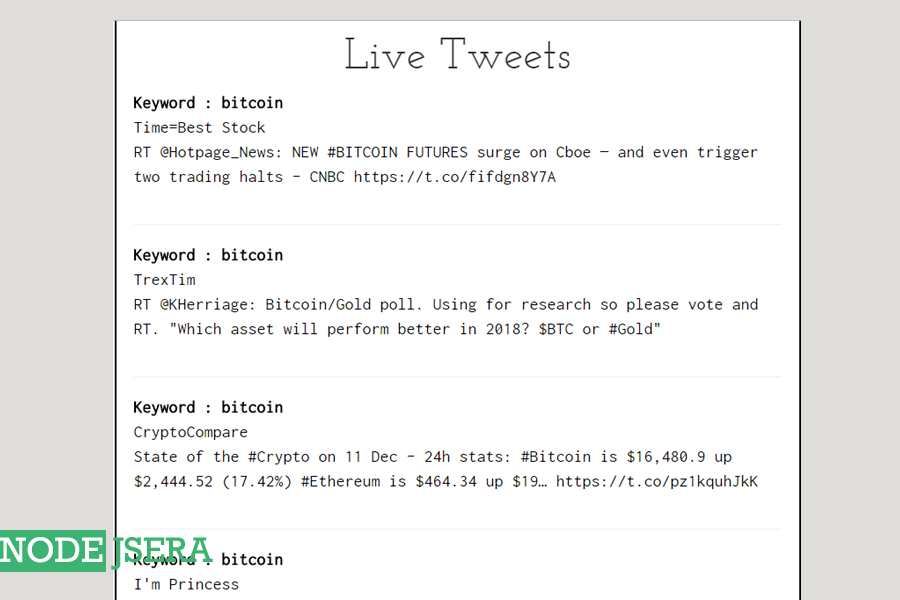
index.html :
URL is : http://127.0.0.1:3000/public/index.html Screenshot of when live tweets are printed on frontend :
In this chapter of 30 days of node tutorial series, We created our second project i.e.
How to get tweets from twitter Using twitter's streaming API , node.js and socket.io
for backend; HTML5 , CSS3 , jquery , socket.io and bootstrap for
frontend; And MySQL database for storage.